


How to Hang Art Gallery Style: A Step-by-Step Guide
TL;DR:
- Hanging art gallery style involves arranging multiple artworks with intentional spacing and a visual anchor. Proper planning, templates, and hardware matching are essential for balanced and safe displays. Treat the entire wall as a single piece to ensure cohesive, visually appealing results.
Hanging art gallery style is the practice of arranging and mounting multiple artworks in a cohesive, visually balanced composition that mirrors professional exhibition displays. Interior designers call this approach “salon-style hanging” when pieces are densely grouped, or “grid hanging” when frames align in uniform rows. Both methods share the same core principles: intentional spacing, a defined visual anchor, and hardware matched to the weight of each piece. This guide covers every step, from selecting tools to avoiding the most common layout errors, so your finished wall looks deliberate rather than accidental.
What tools and materials do you need for a gallery wall?
Preparation determines whether your gallery wall goes up cleanly or requires multiple rounds of patching and rehanging. Gather every item before you touch the wall.
Hardware and measuring tools:
- Tape measure and pencil for marking exact positions
- Carpenter’s level or a digital level app (such as the built-in iOS Measure app)
- Hammer, nails, and a drill with appropriate bits
- Wall anchors and screws sized to your frame weight
- Stud finder for locating structural support behind drywall
Hanging hardware by frame type:
- Wire-backed frames: two-hook system for stability
- Sawtooth hangers: single nail, best for lighter pieces under 10 lbs
- D-ring hangers: most secure option for heavier frames
- Removable adhesive strips: suitable for small, light artworks and renter-friendly walls
Layout planning materials:
- Kraft paper or newspaper for tracing frame outlines
- Painter’s tape for attaching templates without wall damage
- Scissors and a marker for cutting and labeling templates
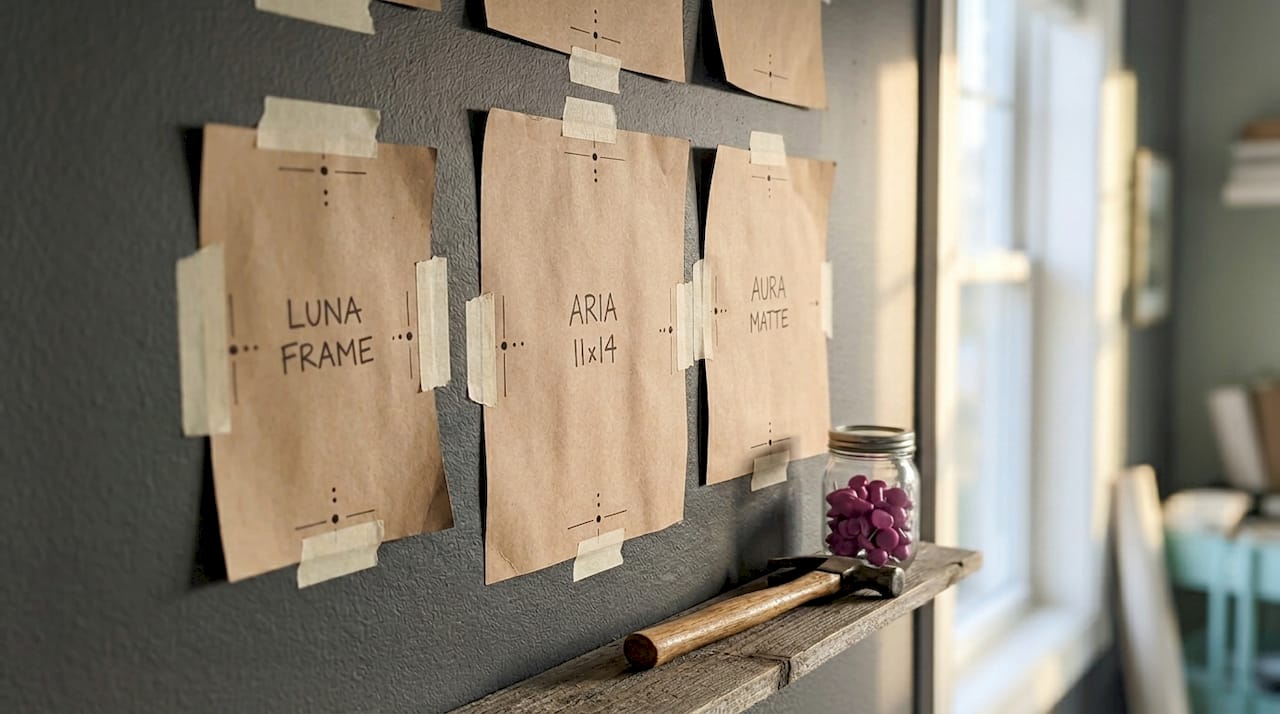
Pro Tip: Label each kraft paper template with the frame name and mark the exact hardware position on the paper itself. This turns your template into a drilling guide, eliminating measuring errors when you move from paper to wall.
For heavier pieces, wall stud placement matters significantly. Studs spaced 16 inches apart support roughly 50 to 100 lbs with proper wood screws, making stud-anchored hanging the safest choice for large or heavy frames. If studs are not where you need them, use toggle bolts rated for the frame weight.
How to plan and design your gallery wall layout
Layout planning is where most gallery walls succeed or fail. The entire process typically takes about two hours, with the main risk of error being measurements checked only after drilling. Invest that time upfront.
Step 1: Choose your composition style
Four primary styles define gallery wall arrangements:
- Tight grid: Uniform frames in even rows and columns. Clean, modern, and easiest to execute with a level.
- Salon style: Mixed sizes grouped densely with 2 to 3 inches between frames. Traditional, rich in visual texture.
- Asymmetric anchor: One large piece anchors the composition; smaller works radiate outward. Works well on wide walls.
- Spotlight: Single artwork with generous negative space. Closer to traditional gallery hanging than a wall grouping.
Step 2: Select frame sizes with intention
Limit yourself to two or three frame sizes per arrangement. Using too many sizes creates visual noise; using only one size produces monotony. A common ratio that works: one large piece (24x30 or larger), two medium pieces (16x20), and three to four small pieces (8x10 or 5x7). This hierarchy gives the eye a clear path to follow.
Step 3: Find your visual midpoint
Anchoring at the visual midpoint and building outward creates a more intentional and balanced look than starting from an edge. Mark the center of your wall space with a light pencil dot. Your largest anchor piece should center on this point.
Step 4: Mock up on the floor, then on the wall
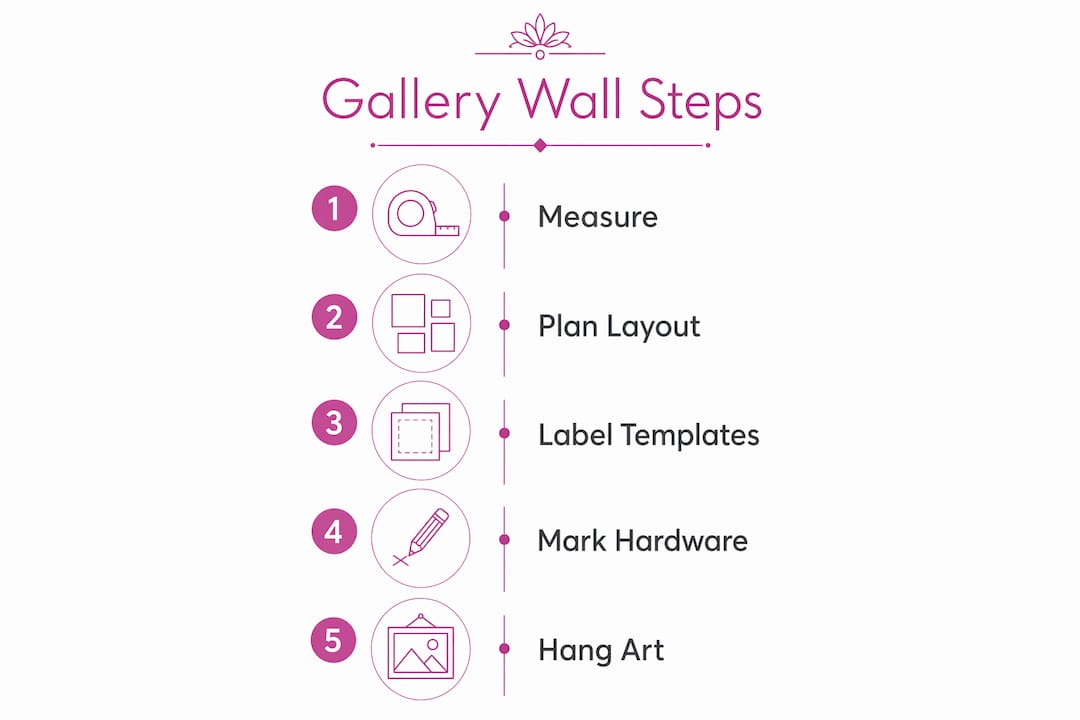
Arrange all frames on the floor first to test the composition without commitment. Once satisfied, trace each frame onto kraft paper, cut out the templates, and tape them to the wall with painter’s tape. This wall mockup process takes about 45 minutes but provides a spatial understanding that floor layouts cannot replicate. You see exactly how the grouping relates to furniture, ceiling height, and natural light.
Step 5: Confirm spacing before drilling
Consistent spacing of 2 to 3 inches between frames is the standard for cohesion. Spacing consistency is more noticeable to viewers than the exact measurement itself, so pick one number and apply it uniformly across the entire arrangement.
| Composition style | Best for | Spacing rule |
|---|---|---|
| Tight grid | Modern, minimal rooms | Exactly 2 inches, uniform |
| Salon style | Living rooms, stairwells | 2 to 3 inches, consistent |
| Asymmetric anchor | Wide accent walls | 3 inches from anchor outward |
| Spotlight | Single statement piece | 6 or more inches of negative space |
Pro Tip: Before removing any template, photograph the wall mockup. Photos flatten perspective and reveal weight imbalances and spacing issues that are invisible when you are standing directly in front of the wall.
For a detailed planning workflow, the DIY gallery wall guide at Emansgallery covers measuring and composing multi-piece displays from start to finish.
How to hang art pieces with precision and safety
The standard hanging height for art is 57 inches from the floor to the center of the artwork. This figure comes from the average human eye level and is the standard used by MoMA, the Tate Modern, and most commercial galleries. The common mistake is measuring to the top of the frame instead. Eye level alignment refers to the center of the artwork, not the top edge.
Adjusting height for furniture:
When hanging art above a sofa, console, or bed, place the bottom edge 4 to 6 inches above the top of the furniture. Size the grouping to span roughly two-thirds the furniture width. This maintains a visual connection between the art and the piece below it, preventing the artwork from appearing to float disconnected on the wall.
Step-by-step hanging process:
- Mark the center point of your intended hanging position with a pencil
- Use a level to draw a light horizontal reference line
- Measure from the top of the frame to the hanging hardware (wire or hanger) to calculate nail placement
- Drive the nail or screw at the calculated point
- Hang the frame and check level immediately
- For multi-piece arrangements, hang the anchor piece first, then work outward
“Treat your gallery wall as a single curated piece rather than a collection of individual items. Every decision, from spacing to hardware, should serve the whole composition.”
Renter-friendly alternatives:
Removable picture hanging strips work well for frames under 8 lbs. Brands like 3M Command offer strips rated for specific weights, and following the weight rating precisely prevents frames from falling. For heavier pieces in rental spaces, consider a modular track system. Museum-grade gallery display systems use wall tracks with rods and hooks to enable flexible, damage-free hanging. These systems allow changing displays without nail holes and are worth the investment for high-finish walls or frequently rotated collections.
Pro Tip: For wire-backed frames, pull the wire taut with your finger to find the exact peak of the arc before measuring. Mark that point on the kraft paper template to get a precise nail location every time.
Common mistakes to avoid when hanging art gallery style
Even well-planned gallery walls fail at the execution stage. These are the errors that appear most often, along with direct fixes.
Hanging art too high. This is the single most common error. Art hung at 57 inches to center feels grounded and connected to the room. Art hung at 65 to 70 inches to center feels disconnected and forces viewers to look up uncomfortably. Measure before you nail, every time.
Ignoring furniture scale. A grouping of five small 5x7 frames above an 84-inch sofa looks lost. The art grouping should span at least two-thirds of the furniture width beneath it. Scale the number and size of pieces to the furniture, not to personal preference alone.
Skipping the mockup. Drilling directly from mental planning leads to costly rehangs. Kraft paper templates serve as both layout tools and precise hardware marking guides, eliminating the errors that come from measuring twice but drilling once in the wrong spot.
Using inadequate hardware. A nail rated for 10 lbs holding a 25-lb frame will eventually fail. Match hardware to the actual weight of each framed piece, including the frame itself. Weigh frames on a bathroom scale before selecting hardware.
Neglecting lighting. Gallery-style display depends on light as much as placement. Picture lights mounted above individual pieces, or directional track lighting aimed at the wall, dramatically increase the visual impact of any arrangement. A well-lit gallery wall in a dim room outperforms a poorly lit one in a bright room.
Pro Tip: After hanging, step back at least 10 feet and take a photo. Then view the photo on your phone screen. The reduced scale reveals asymmetry, color imbalances, and spacing inconsistencies that your eye misses at close range.
For a complete pre-hang checklist, the gallery wall checklist at Emansgallery covers all eight steps for modern homes.
Key takeaways
Hanging art gallery style requires a defined visual anchor, consistent spacing, and hardware matched to each frame’s weight before a single nail enters the wall.
| Point | Details |
|---|---|
| Anchor at the midpoint | Place your largest piece at the visual center and build the arrangement outward from there. |
| Use kraft paper templates | Trace and tape frame outlines to the wall before drilling to confirm spacing and composition. |
| Center height at 57 inches | Measure to the center of the artwork, not the top of the frame, for correct eye-level placement. |
| Match hardware to weight | Weigh each framed piece and select nails, anchors, or strips rated above that weight. |
| Photograph before committing | A photo of the wall mockup reveals spacing and balance issues invisible at close range. |
What I have learned from hanging art gallery style
The advice I find most underused is treating the entire gallery wall as one piece of art rather than a collection of separate frames. When you approach it that way, decisions become clearer. You ask whether a new piece serves the whole composition, not just whether you like it in isolation.
I have seen people spend hours on floor layouts, then abandon the plan the moment they start taping things to the wall because the proportions look different vertically. The wall mockup with kraft paper is not optional. It is the step that converts a good floor plan into a wall that actually works. The spatial understanding from wall mockups is simply faster and more accurate than floor layouts alone.
My personal preference is to mix two or three frame sizes rather than using a single uniform size. Uniform grids are clean, but they require perfect execution to look intentional. Mixed sizes are more forgiving and read as curated rather than formulaic.
One thing I rarely see discussed: lighting transforms a gallery wall more than any single piece of art. Before you finalize placement, hold a lamp at different angles to see how light hits each piece. That test takes five minutes and changes the entire decision about where the anchor piece should sit.
For rooms where drilling is not an option, leaning art on shelves or against the wall in layered arrangements is a legitimate display method, not a compromise. Some of the most considered displays I have seen use leaning as a deliberate choice, not a fallback.
— Eman
Find the right art for your gallery wall at Emansgallery

A gallery wall is only as strong as the art within it. Emansgallery offers original handmade paintings by artist Eman Khalifa across abstract, geometric, floral, landscape, seascape, and still-life styles, along with museum-quality canvas prints in sizes suited for anchor pieces and supporting works alike. The Private Eye canvas print is a strong choice for a contemporary anchor piece, while the full wall art prints collection covers a range of sizes and styles for building out a complete arrangement. Every piece ships worldwide from fulfillment centers in the UK, USA, Canada, Australia, and across Europe and the UAE.
FAQ
What is the correct height for hanging art gallery style?
The center of the artwork should sit at 57 inches from the floor, which corresponds to average eye level. When hanging above furniture, place the bottom edge of the art 4 to 6 inches above the top of the piece below it.
How much space should be between frames on a gallery wall?
Consistent spacing of 2 to 3 inches between frames is the standard for a cohesive gallery wall. Spacing consistency matters more to viewers than the exact measurement, so choose one gap and apply it uniformly.
What is the difference between salon-style and grid-style hanging?
Salon-style hanging groups mixed frame sizes densely with 2 to 3 inches between pieces, creating a rich, layered look. Grid-style hanging uses uniform frames in even rows with identical spacing, producing a clean, modern result.
Can renters hang art gallery style without damaging walls?
Removable adhesive strips work for frames under 8 lbs, and modular track systems provide a damage-free option for heavier pieces. Both methods allow full gallery-style arrangements without nail holes.
How do I keep a gallery wall looking balanced?
Anchor the composition at the visual midpoint of the wall, use two to three frame sizes, and photograph the layout before drilling. The photo reveals weight imbalances and spacing issues that are difficult to detect in person.
Stay Connected
- ✨ Explore Eman Khalifa's original art, fine art prints and art-inspired merchandise.
- Follow Eman Khalifa's art journey on: Instagram @emans_gallery and Facebook
- Watch Eman Khalifa creating live art on: YouTube @emans_gallery
