


How to Create a Wall Gallery: Step-by-Step Guide
TL;DR:
- A gallery wall transforms a blank wall into a curated display of artwork, photos, or objects.
- Planning the layout on paper and floor prevents misalignment and saves time during installation.
A gallery wall is a curated arrangement of multiple framed artworks, photos, or objects that creates a unified visual statement on a single wall. Done right, it transforms a blank surface into the most personal and striking feature in any room. This guide covers the tools you need, how to plan your layout, professional hanging techniques, and the most common mistakes to avoid. Emansgallery offers original paintings and canvas prints that work beautifully as anchor pieces or complementary additions to any gallery wall arrangement.
How to create a wall gallery: what you need before you start
The right tools make the difference between a gallery wall that looks intentional and one that looks accidental. Gather everything before you touch the wall.
Tools:
- Measuring tape and pencil
- A level (a small torpedo level works well)
- Hammer and assorted nails
- Painter’s tape
- Kraft paper or newspaper for templates
- Scissors
Materials:
- A mix of frames in complementary sizes and finishes
- Mats for smaller photos (an 8x10 photo in a mat fills a larger frame and holds its own alongside bigger pieces)
- Hanging hardware: nails, D-rings, picture wire, and adhesive strips
Adhesive strips rated for frame weight are the best option for renters. They must be allowed to set for at least one hour before you hang anything. Skipping that set time is the most common reason strips fail.
Pro Tip: Add adhesive felt bumpers to the bottom two corners of every frame. They prevent frames from tilting and protect your wall finish.
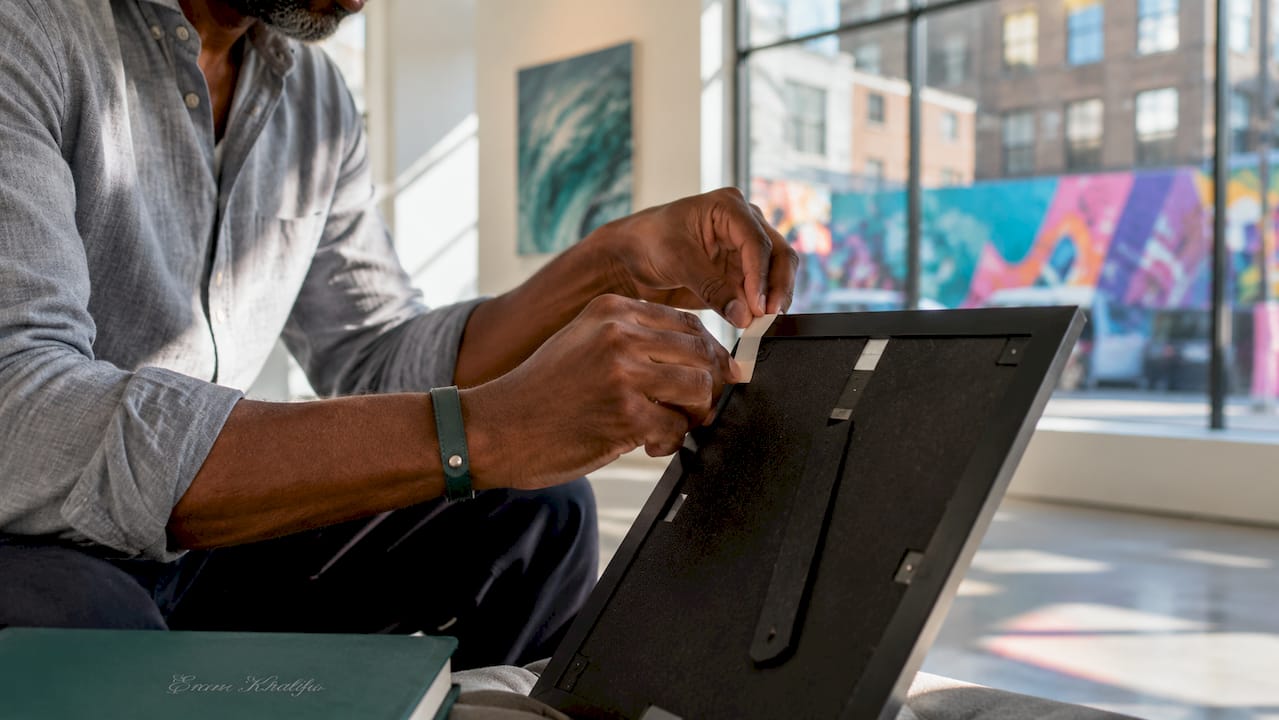
For heavier frames over 20 pounds, skip adhesive strips entirely. Use wall anchors or locate a stud with a stud finder and drive a screw directly into it.
How do you plan a gallery wall layout?
Planning on paper and on the floor saves you from a wall full of unnecessary nail holes. This stage is where most people skip ahead and regret it.
Step 1: Measure your wall space
Measure the full width and height of the available wall. Note any obstacles like light switches, outlets, or windows. Write these dimensions down before you pull a single frame off the shelf.
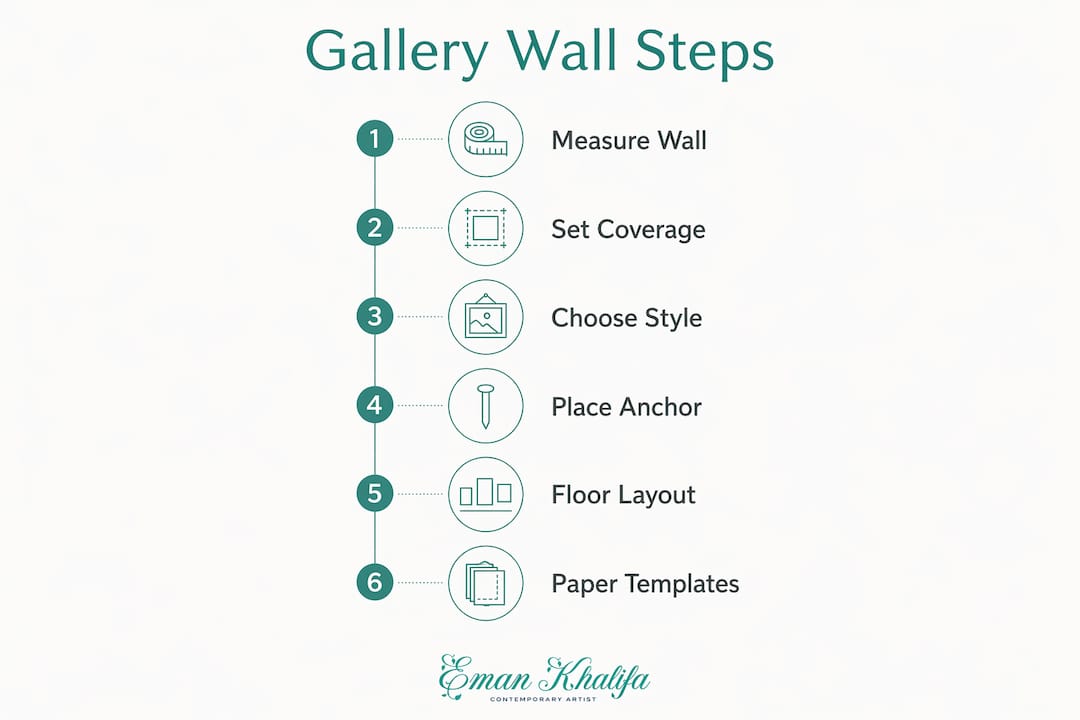
Step 2: Set your coverage target
Designers advise filling 70–75% of the wall area for a cohesive display. That figure means your collection should feel substantial without crowding the wall edge to edge. Leave healthy blank space on all four sides of the grouping so it reads as a deliberate cluster, not a random scatter.
Step 3: Choose a layout style
| Layout Style | Best For | Key Characteristic |
|---|---|---|
| Grid | Uniform frames, photos | Symmetrical rows and columns |
| Salon | Mixed sizes and styles | Organic, floor-to-ceiling feel |
| Center anchor | Statement piece with supporting art | One large piece surrounded by smaller ones |
| Shape fill | Defined geometric outline | Frames fill a circle, arch, or rectangle |
The center anchor layout is the most forgiving for beginners. It gives you a clear starting point and builds outward naturally.
Step 4: Place your anchor piece first
Start with the largest piece placed slightly off-center as your anchor. An off-center anchor creates natural eye movement across the wall. A perfectly centered anchor tends to feel static and formal, which works in some rooms but limits your flexibility when adding pieces around it.
Step 5: Build your layout on the floor
Lay all frames on the floor in front of the wall. Arrange them until the grouping feels balanced. Maintain consistent spacing of 2–4 inches between every frame. That uniform gap is what separates a curated gallery from a cluttered collection.
Step 6: Transfer to paper templates
Trace each frame onto kraft paper and cut out the shapes. Tape the paper templates to the wall with painter’s tape and step back. Live with the arrangement for a day if you can. Adjust until you are satisfied, then mark your nail positions through the templates.
Pro Tip: Take a photo of your floor layout before you start taping templates. You can refer back to it if templates shift or fall during the transfer process.
What are the best techniques for hanging a gallery wall?
Hanging is where planning pays off. Follow these steps in order and you will get professional results on the first attempt.
-
Set your gallery center height. The optical center of a gallery wall should sit 57–60 inches from the floor. That range matches the standard used in professional gallery displays and aligns with average eye level. Mark this center point on the wall with a small pencil dot before you hang anything.
-
Measure from hanging hardware, not the frame top. Always measure the distance from the top of the frame to the hanging hardware (the wire or D-ring at its tightest point). That measurement tells you exactly how far below the nail your frame will sit. Measuring only to the top of the frame is the single most common cause of crooked or misaligned artwork.
-
Nail through your paper templates. With templates still taped to the wall, drive nails through the marked hardware points. Then tear away the paper. Your nail is already in the right spot.
-
Mix frame orientations. Alternate vertical and horizontal frames throughout the arrangement. A wall of all vertical frames feels narrow. A wall of all horizontal frames feels wide and low. Mixing both creates visual rhythm and makes the eye move across the whole grouping.
-
Check level after every frame. Hang one frame, check it with a level, then move to the next. Do not hang five frames and then check. Errors compound quickly.
-
Add felt bumpers to every frame. Stick adhesive felt pads to the bottom two corners of each frame after hanging. They grip the wall slightly and stop frames from rotating out of alignment over time.
Pro Tip: For large or heavy frames, locate wall studs with a stud finder before marking nail positions. A stud mount holds significantly more weight than a nail in drywall alone.
The 57–60 inch center height standard is used in 90% of professional gallery displays. Applying it at home gives your wall the same polished, intentional quality you see in curated spaces.
What gallery wall mistakes should you avoid?
Most gallery wall problems come down to a few repeated errors. Knowing them in advance saves time and frustration.
- Wrong scale. Frames that are too small for the wall leave it looking sparse. Frames that are too large crowd the space. Use the 70–75% coverage rule as your guide.
- Too many competing frame styles. Mixing five different frame finishes across ten frames creates visual noise. Limit yourself to two or three finishes that share a common tone, such as black, gold, and natural wood.
- Inconsistent spacing. Gaps that vary from one inch to six inches make a gallery look accidental. Stick to the 2–4 inch standard throughout.
- Hanging art too high. Most people hang art too high by default. The 57–60 inch center rule corrects this. Art hung above eye level disconnects from the viewer and from the furniture below it.
- No grounding element. A gallery wall floating above an empty floor looks unfinished. Anchor it visually with a sofa, console table, or bookcase below the arrangement.
- Skipping the floor layout. Committing to nail positions without testing the arrangement on the floor first leads to regret. The floor layout step takes 20 minutes and prevents hours of patching and repainting.
- Ignoring weight ratings on adhesive strips. Each strip has a maximum weight rating printed on the packaging. Exceeding it causes frames to fall. Check every frame’s weight before choosing your hanging method.
“A gallery wall should maintain blank space around all four edges to ground the grouping and prevent a cramped look.” — House Beautiful
Using mats on smaller photos is one of the most effective ways to solve a scale problem without buying larger frames. A mat increases the visual size of a small piece and gives it presence alongside larger artworks. You can also mix framed art with found objects, ceramic plates, or sculptural pieces to give the wall a collected, personal quality.
For a deeper look at professional display principles, the gallery wall style guide at Emansgallery covers balance and unity in detail.
Key takeaways
A successful gallery wall requires a measured center height of 57–60 inches, consistent 2–4 inch frame spacing, and a tested floor layout before any nails go into the wall.
| Point | Details |
|---|---|
| Set the right height | Place your gallery’s optical center 57–60 inches from the floor for eye-level viewing. |
| Plan before you hang | Arrange frames on the floor and use paper templates on the wall before driving nails. |
| Use consistent spacing | Keep 2–4 inches between every frame to create a unified, curated look. |
| Start with an anchor piece | Place your largest frame slightly off-center first, then build the arrangement around it. |
| Match hanging method to weight | Use adhesive strips for light frames and wall anchors or stud mounts for heavy ones. |
What I have learned from building gallery walls
The most common mistake I see is treating a gallery wall as a collection of individual pictures rather than a single composition. The moment you start thinking of the whole grouping as one piece of art, your decisions get clearer. Spacing becomes consistent. Frame choices become more deliberate. The wall starts to feel designed rather than assembled.
The floor layout step is the one most people skip, and it is the one that matters most. Spending 20 minutes arranging frames on the floor before touching the wall saves hours of patching. I have rearranged floor layouts four or five times before finding the right balance. That time costs nothing. Nail holes in the wrong places cost real effort to fix.
Mats are underused. A sentimental photo that is 4x6 inches looks lost on a gallery wall without one. Drop it into a mat and a larger frame, and it holds its own next to a 16x20 canvas print. The mat does not diminish the photo. It gives it the space it deserves.
My honest recommendation: start with one strong anchor piece and build outward slowly. Resist the urge to fill the wall all at once. A gallery wall that grows over time, with pieces added as you find them, always looks more personal than one assembled in a single afternoon.
— Eman
Original art for your gallery wall from Emansgallery
A gallery wall built around original art carries a quality that printed reproductions cannot replicate. Emansgallery offers one-of-a-kind original paintings and museum-quality canvas prints by artist Eman Khalifa, spanning abstract, geometric, floral, landscape, and seascape styles.

Pieces like Good Tidings, a fluid blue and gold ocean painting, and Mystic Sea, a dramatic abstract ocean work, are strong choices as anchor pieces. For a more structured look, the City in Grids canvas print brings geometric precision to any arrangement. Browse the full wall art prints collection at Emansgallery to find pieces that fit your wall and your style. Worldwide shipping is available from the UK, USA, Canada, Australia, and more.
FAQ
What height should a gallery wall be hung at?
The optical center of a gallery wall should sit 57–60 inches from the floor. This range matches standard eye level and is used in 90% of professional gallery displays.
How much space should I leave between frames?
Keep 2–4 inches between frames throughout the arrangement. Consistent spacing is what makes a gallery wall look curated rather than random.
How do I hang pictures without damaging walls?
Use adhesive strips rated for your frame’s weight and allow them to set for at least one hour before hanging. This method is reliable for lighter frames and leaves no nail holes.
How do I arrange wall art before hanging it?
Lay all frames on the floor in front of the wall and test your arrangement there first. Then trace each frame onto paper, cut out the shapes, and tape the templates to the wall to confirm placement before driving any nails. The step-by-step hanging guide at Emansgallery walks through this process in detail.
How many pieces do I need for a gallery wall?
A gallery wall typically works well with five to fifteen pieces, depending on wall size. The key is filling 70–75% of the designated wall area so the grouping feels substantial without crowding the edges.
Stay Connected
- ✨ Explore Eman Khalifa's original art, fine art prints and art-inspired merchandise.
- Follow Eman Khalifa's art journey on: Instagram @emans_gallery and Facebook
- Watch Eman Khalifa creating live art on: YouTube @emans_gallery
